Brick walls have been used for ages to add texture and depth to homes. They bring a rustic charm to your interiors and can be transformed to fit any decor style. However, if you’re not a huge fan of the traditional reddish-brown brick color or simply want to add a bit more brightness to your home, then white-wash brick is your best bet. In this blog post, we’ll show you how to update the look of your brick walls with a fresh coat of whitewashed brick and transform your home into a brighter and more updated space.
Homeowners with split-level, mid-century colonial-style homes featuring red or brown brick exteriors often yearn for a unique aesthetic that combines their love for vintage and modern design principles. They are increasingly drawn towards the vintage farmhouse decor trends which offer a perfect blend of rustic charm and contemporary sophistication. One particular trend that’s garnering significant interest is the distressed, whitewashed look. This style not only brightens up the space but also allows the unique characteristics of the bricks to shine through, adding an aged yet chic appeal to the home. Whitewashing aligns seamlessly with the farmhouse trend, adding a touch of time-worn charm while maintaining the sturdiness and classic appeal of brick.
What Is Lime Washing?
Limewashing brick is a technique that involves applying diluted paint made from slaked lime (calcium hydroxide) and water to the surface of bricks. The result is a beautifully distressed, antique-looking finish that allows the natural texture and variation of the bricks to show through. This process is different from conventional paint because the limewash paint is absorbed by the brick, creating a bond that doesn’t peel or chip. The limewash is also highly breathable, allowing moisture to evaporate from the brick, which makes it an excellent choice for older homes. With its natural, muted tones, limewashing is an ideal choice for those looking to achieve a farmhouse or shabby chic style in their homes.
German Smear vs Limewash
German Smear, also known as German Schmear, is another technique used to give your brick walls a rustic and antiquated look. The process involves applying a mixture of mortar and Portland cement to the brick house and then partially removing it to achieve the desired effect. Unlike limewash, which gives a softer, more diffused finish, German Smear leaves more of the original brick exposed. This creates a more dramatic, textured look. While both techniques create a distressed and rustic appearance, the choice between the two largely depends on the style you’re aiming for. If you prefer a brighter, more uniform appearance with a touch of vintage charm, limewash might be more suitable. On the other hand, if you’re drawn to a more rugged and dramatic aesthetic, the German Smear technique would be a better fit.
What Is The History And Benefits Of Limewashing?
Limewashing has a deep-rooted history, tracing back to the early Roman times. Stone and stucco buildings in European villages were frequently limewashed as it was an inexpensive and practical solution to protect their homes. The limewash served as a form of breathable coating, safeguarding the buildings from harsh weather conditions while preventing the growth of mold and bacteria due to its high pH. This ancient technique also had the added benefit of being an insect deterrent, a crucial feature in those days. Today, homeowners can still reap these benefits. Limewashing acts as a natural, eco-friendly option offering a layer of protection without trapping moisture, reducing the risk of mold, mildew, and damage from the elements. Its natural beauty and lasting durability make limewashing a viable choice for individuals aiming for a balance of aesthetics and practicality.
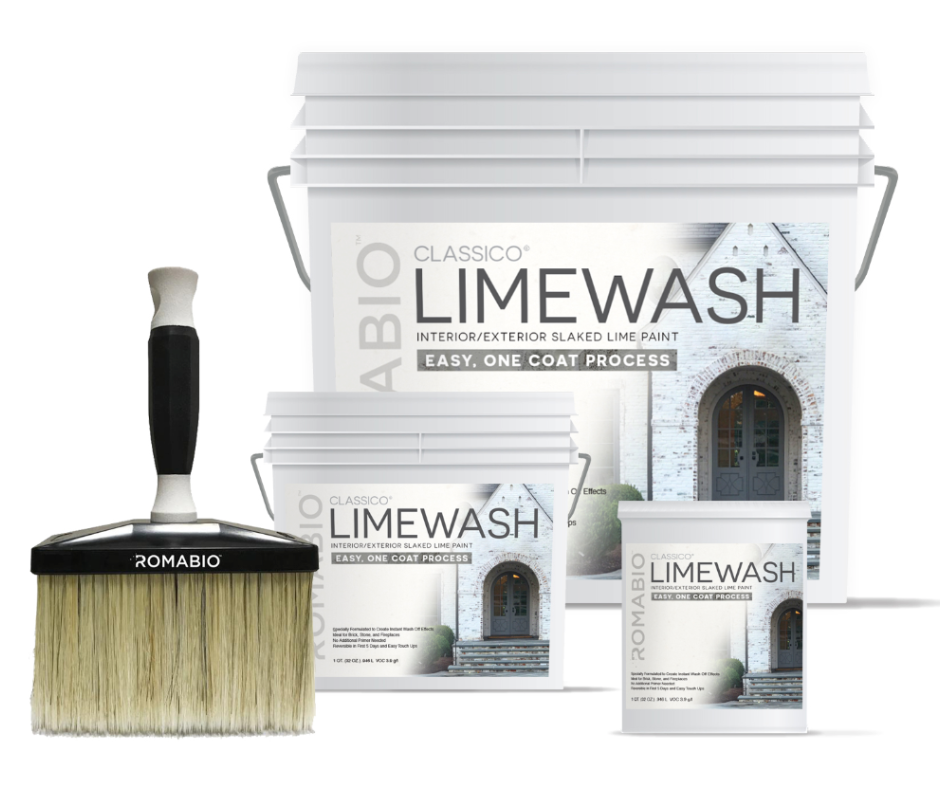
Choosing The Right Products For Limewashing Brick
Limewashing brick walls is a considerably superior choice over traditional painting when it comes to achieving an upscale, whitewash brick finish while still preserving the integrity of the brick. Unlike paint, which forms a layer atop the brick surface, limewash soaks into the brick, ensuring that the brick’s natural texture and color variations show through, thus creating a more authentic and enriched aesthetic. Furthermore, limewash provides an important protective benefit by allowing the brick to breathe and wick away moisture, thus reducing the risk of trapped moisture, which can lead to issues such as mold and mildew. In contrast, paint can seal in moisture, potentially causing damage over time. In the quest for top-quality limewash products, Romabio’s one-coat Classico Limewash stands out as one of the best in the market. Offering a high-quality, easy-to-use solution for achieving the coveted German Schmear effect, its unique formulation is capable of delivering a well-layered, antique look, mimicking years of natural weathering, in just one coat.
How To Whitewash Brick Exteriors With Limewash
Before embarking on your limewashing journey, it’s crucial to ensure that your brick will absorb the limewash effectively. Limewash binds best to porous surfaces, and would not work properly on painted or sealed bricks. To test the absorption rate of your bricks, you can simply spray a section with water and observe the reaction. Waiting for a minute or two would be enough to see if the water soaks into the brick or if it beads up. Beading water signals that the brick has been sealed and hence may not be suitable for limewashing. Conversely, if the water is absorbed, your brick is an excellent candidate for a fresh, attractive coat of limewash.
Selecting Colors To Limewash Brick On A Brick Wall
Selecting the right color for your limewash project is an essential step. Considering the color of your roof and trim will help ensure a harmonious look. Most suppliers offer a variety of limewash colors that can seamlessly blend with different exterior elements. You might consider ordering samples of your shortlisted colors and applying them on a small patch of brick to assess how they look in different lighting conditions. Seeing how the colors appear at various times of the day can give you a more accurate idea of the final look. It’s also recommended to seek professional help for such projects. Experienced professionals, like Trico Painting, can provide invaluable advice regarding color selection and application techniques, ensuring a high-quality, long-lasting result. Their expertise can also alleviate the stress of tackling such a project and help avoid costly mistakes.
When selecting an exterior paint color, it is crucial to coordinate the shade with the roof and trim colors of your home. However, when considering a shade of Classico Limewash, it is also important to take into account the color of your home’s exterior brick. You have the option to showcase more of the brick as an undertone to the finish or cover more of it for a predominantly white appearance. Classico Limewash offers a selection of seven pre-mixed colors and can even be custom-tinted to match any white or off-white shade, such as those found in Benjamin Moore paint colors.
Let’s Get Started
Prepare the Brick Walls: Before whitewashing your brick walls, it is crucial to thoroughly clean them. Begin by gently brushing off any loose debris using a soft brush. Then, employ a mild soap and water solution to scrub away any stubborn dirt or grime. Allow the walls to dry completely before proceeding to the next step, which involves gathering your whitewashing supplies to initiate the lime-washing process. Here’s a list of the necessary items you’ll need.
- ” value=”2″>A Large Masonry Brush (do not use a paintbrush or roller)
- ” value=”4″>Clean Rags and Sponge To Dab and Distress Finish
- ” value=”6″>Measuring Cup For Water
- ” value=”8″>Drill With Painters Paddle For Mixxing
- ” value=”10″>Painters Plastic
- ” value=”12″>Scrub Brush For Extra Distressing
How To Mix Limewash With Water
When limewashing brick, it is important to always wear gloves. Although the product itself is non-toxic, lime can be slightly caustic, so it is best to minimize skin contact.
For Romabio Limewash, a single coat is typically sufficient. Upon opening the Limewash bucket, you will notice its clay-like appearance. Transfer the Limewash to a mixing bucket and prepare your drill and paddle. Dilute the Limewash with water to achieve the desired consistency.
Many people start by diluting the Limewash by 50% with water. For example, a 50% dilution would consist of 2 gallons of Limewash and 1 gallon of water. This will result in a thicker product, providing a more opaque look. Alternatively, for a thinner whitewash, you can dilute it by 100% using equal parts Limewash and water. We recommend starting with a 50% dilution, testing a small area, and adjusting the water content as desired. Thoroughly mix the Limewash and water using a power drill and mixing paddle until it becomes smooth and resembles a paint.
How To Apply Limewash
- ” value=”2″>After applying the limewash, allow it to dry for about 15 to 20 minutes before beginning the distressing process. Remember, the optimal time frame to distress the mortar wash is within the first hour of application, so it’s advisable to work in manageable sections or designate a second person to perform this task to ensure timely distressing.
- ” value=”4″>While the limewash is impressively durable, it remains flexible for up to 2-5 days after application, presenting an opportunity for further distressing or removal. This can be achieved by simply using a spray bottle and a scrub brush to either add another coat for a denser look or scrub off more to reveal an additional brick surface, giving you the freedom to refine your desired aesthetic.
Cleaning up after applying limewash is a breeze, requiring only soap and water to remove any residue. However, once the limewash has fully dried, removal becomes a bit more challenging. In such cases, a solution of vinegar and a bit of elbow grease with a scrub brush can effectively remove the limewash.
Conclusion:
Limewashing brick can impart a beautiful, rustic charm to your home’s exterior, enhancing its curb appeal and overall aesthetics. The process, although a bit laborious, is straightforward enough to undertake as a DIY project. However, professional help can also be sought for a flawless, long-lasting result. By following the guidelines shared in this tutorial, you can transform the look of your brick home with a fresh coat of limewash. The final result is a beautifully aged finish that is not only attractive but also durable and requires minimal maintenance. Enjoy the timeless appeal of limewashed brick and the satisfaction of a job well done!
Frequently Asked Questions
- ” value=”2″>Can I use latex paint on brick instead of limewash? While latex paint can be applied to brick, it doesn’t offer the same benefits as limewash. Latex paint forms a layer on the brick’s surface, potentially trapping moisture and leading to issues like mildew and peeling over time. On the other hand, limewash is breathable, allowing moisture to escape and reducing these concerns. Additionally, limewash delivers a unique, rustic look that can’t be replicated with latex paint. Hence, if you’re after authenticity and longevity, limewash is the preferred choice for brick.
- ” value=”4″>Can I use a thin layer of Blended Portland Cement to German Smear Brick? Yes, a thin layer of Blended Portland Cement can be used to achieve a German Smear effect on brick. The process involves applying a thin layer of the cement mixture to the brick surface and then partially wiping it off while still wet, leaving some areas more covered than others. This creates a distressed, old-world charm reminiscent of aged European structures. However, bear in mind that, unlike limewash, Portland Cement isn’t breathable, which means it doesn’t allow moisture to evaporate from the bricks. This could potentially lead to moisture-related issues over time. Always consider the pros and cons of any technique before deciding on the best option for your specific situation.
- ” value=”6″>What is lime putty? Lime putty is a type of lime product used in traditional building methods and restoration projects. It is made by adding water to quicklime, resulting in a chemical reaction that produces heat. This process, known as slaking, creates a putty-like substance. Lime putty is appreciated for its flexibility and breathability, making it suitable for use on historic buildings as it allows structures to move without cracking and lets moisture escape from the masonry. It is often used in plaster, mortar, and limewash, contributing to the durability and unique aesthetic of these finishes.